Monday, May 23, 2011

Wedding dress, part 4

This week, the lovely Maria's wedding dress is in the spotlight.

Maria came to me with a pretty specific idea of what she wanted and what suits her. I was thrilled: one of the greatest hurdles in designing a wedding dress is trying to devine what a bride truely wants when she doesn't even know herself!
Maria knew what she liked, what looked good, and what she felt comfortable in, which is a big deal as well. Many women are prepared to feel uncomfortable on their wedding day to achieve their ideal look, but it can also show up clearly in photos, and in real life, that you're not actually able to breathe, or your feet are killing you, or that your dress keeps falling down. Not a good look.

So Maria's wedding context was as follows:
 1. Setting: Winery
2. Season: Autumn
3. Style: Contemporary, 
with an Italian/Indian theme (bride and groom, respectively).

Maria bought me a few photos of the style she thought would be perfect and her ideal colour: soft, mauve-y blue. Its hard to explain.


This Roberto Cavalli gown worn by Christina Applegate was Maria's most important source photo. She loved the draping across the bodice, and the flattering boned corset shape, with the slim-line skirt and detailed back. Being petite, Maria didn't want to have a big skirt, and her wedding would not be one at a which a large white gown would have suited anyway.

So I went about finding exactly the right shade of blue chiffon for Maria, about 6 months before the wedding. This was important because colour production can be very unreliable and is determined by manufacturers trends, not what the consumer wants! 
Luckily, I found an incredible colour match at Rathdowne Fabrics & Remnants, for a great price and bought about 6m. 

When we got closer to her date, I began construction of Maria's dress. I made a toile, for the corset and basic skirt line, then got stuck into construction, proper.

We chose a silk satin, called Sea Pearl, to go under the blue chiffon, as Maria's groom was wearing a traditional Indian wedding suit, all gold and burgundy. And her bridesmaids were in augergine, so to pull all the elements together, I suggested a soft fleshy colour underneath. 

corset pieces

constructed, with boning and fusing

Corset, inside out with extra shaping fusing.

I used a lovely soft knitted fusing that went well with the softness of the beautiful satin, and didn't give it that "fused-to-within-an-inch-of-its-life" look. I also added extra fusing around the top of the bust to keep it firm against her body.

Dress underlay in Sea Pearl satin

Back/side view


The pictures above show the dress on my mannequin, which is too long for Maria's dress, hence the funny cups on the corset! 
This was actually a major problem because the next stage was draping onto the satin base, to create the blue layer.
I had to work at the hip/skirt section first, then move the whole thing up and work on the bust and shoulder draping, but it went pretty well. 

Practice draping

Almost finished, with cap sleeves

Hanging, back view

With Diamante feature, back view.

So, in the end, I was pretty happy with the result, and Maria was too; its always such a challenge to have a red-carpet gown to measure up to, but also to be inspired by. I think Maria felt very "her", and just right for her wedding, and she looked beautiful!


My next bride in the spotlight will be a Japanese-inspired cocktail-length number; stay tuned!

Wednesday, May 18, 2011

Winter Lovelies

I know, two posts in one week - you're thinking - "what's going on??"
Well, I have a concussion, from dancing too hard at a wedding on the weekend. Fail.

So, yay! More nice things to share from the couch!

First up, new stock at Lissom Yarn....

I am loving these new items in store, called SnuggArms. They're made by a Canberran textile artist, and she designed them to combat the chilly winter weather in our nation's capital.... but they are very useful in Melbourne, as winter has suddenly arrived.

These fingerless "mittens" are awesome. I had to purchase myself a pair from my own stock last week, when the temperature in my shop dropped in to about 8C at 3pm in the afternoon. And I've barely taken them off...

I have a limited stock, but in beautiful colours. These handsome, hand-knitted mitts come in two-tone designs, in reds, navy and grey, blue and green... oh except I just bought those! Also, I have one beautiful pair of cream gauntlets, which are a larger, more dramatic version.
See them at the Hingstonbrook website.

If you get cold hands and want to make them snugg, come and get yourself some of these beauties. They're made from Australian wool, and can be ordered in specific colour ways to suit your wardrobe.

Yay.


Next up we have new pieces from Grazed Youth. I have two of these tops in red merino wool and in three black merino. They feature a soft open turtleneck, t-shirt sleeves and a wide hem.

Check out better pictures here!
They're great to layer over skinny jeans, especially, and I just love the bright red, to add some colour to your winter wardrobe. Its so hot right now. 
Handmade in Australia.

I'm also doing a range of made-to-measure knit dresses this winter. 
Custom order, in Blue Gray
Cutting out


Last year I made a few versions in black and they were a hit. So this year they're available in six colours, custom made, for only $149.00. 
This means you can choose your skirt length, shape, sleeve length and neckline, to make a dress that is perfectly suited to you, and perfect for winter layering.

Colours available are: Red, Merlot, Khaki, Sage Gray, Black and Navy, all in 100% Merino wool.

Thats all for today!


Monday, May 16, 2011

2011 Met Ball, New York

Well, for a bit of variety, I thought I'd share my favourite gowns from the Metropolitan Museum of Art's "Alexander McQueen: Savage Beauty" Costume Institute Gala, 2011.

This is a great event that a client put me onto, and has a bit more pop than the regular red carpet outfits, which have become so damn boring, in our times of over-stylined celebrity. I would love a few more celebrities to man-up on their stylists and go for broke. Or just choose stuff that they actually love?

Anyway, here we go..

So there were some strong trends, like wearing red on the red carpet. Camouflage is always a great way to stand out, surely? Gisele and Lea and a few others wore the ever-present silk-crunch-confection, while others went for the slim red line.

Gisele Buchen
Mary Kate in vinatge Givenchy
J-Lo in Gucci
Lea Michele in Escada


I particularly love Mary Kate's choice - I never thought I'd say that. Whilst the vinatge trend still creeps into every corner, I absolutely love how she stands out from the silk taffeta-wearing red-carpet crowd. But I have a weakness for real hippie couture.
J-Lo's floral wrap is amazing as well, it makes her look like beautiful wallpaper.

Next, Michelle Williams in Miu Miu.


I adore this dress; if I could speak French sufficiently to rhapsodise about this dress, I would. Apart from my love of bird motifs, this is just a ripper of a dress. Its so deeply elegant, with the 1930's draping around the arms and the slim skirt and grosgrain belt. Its all so restrained, and with her hair, it just pops. Sexy and elegant and timeless altogether.

Elizabeth Banks, Maggie Gyllenhall and Diane Kruger all rocked the sequined dress:


Again, these are great because they are elegant, yet exciting red carpet gowns. There is nothing as simply appropriate as a sequinned frock for a gala. I love the matte sequins and muted tones; shades of gold and flesh, and Maggie's midnight blue is stunning and restrained.


And just for fun, and because I love Mick Jagger, his arm candy (girlfriend L'Wren Scott) designed her dress and I think its rad. Clearly I'm loving black/navy and gold, but it been a while since it was a popular choice and I think its outrageously right on some people.

Lastly, the ever-gothic Christina Ricci, in Zac Posen.

Christina Ricci is what Helena Bonham-Carter could be, if she were fresher and more fashion savvy. Ricci's strong personal style sometimes overwhelms the flimsy numbers she chooses, but more often than not, her dark, romantic choices are great, and this is definitely one of them! 
This is such a classic example of "wearing the dress", as opposed to "being worn". Its a killer gown, but she carries it off with class and power and makes it all work. The fit is incredible and the design has everything: classic silhouette and strength, with very contemporary fabrics and treatment that contrast in their delicacy: its a tour de force of line. 
I think I love it because it's so like an ink illustration; all black tones and graded lines. Very exciting.


There were so many more, but whether it was a boring fabric choice or detestable celebrity (Blake...) wearing it, I choose not to comment on those. 


Sunday, April 17, 2011

How to design your wedding dress, part 3.

Third instalment...

This week is a very fun wedding dress conversion.

One day the client, Kathryn, came into the shop with her Mum's wedding dress from the 1970's. It was a sweet, but very '70's dress with a lace high - necked bodice and sleeves, and polyester A-line skirt. She wanted to wear it to honour her mum, and to hopefully get an original dress for her own wedding.

1970's wedding dress
Back 

Kathryn said she wanted to transform it into a modern dress for her beach wedding. She wanted a strapless, boned bodice with the lace extended down to the hipline, and a slimmer skirt line. I suggested a a silk lining and possibly an over-lay on the skirt in order the cover the polyester. For her budget I needed to "retro-fit", not deconstruct, then re-construct the entire dress. 

So the three "S's" for Kathryn were;
1. Setting: Beach
2. Season: Autumn
3. Style: Contemporary

We integrated these through the modern strapless design, and the softness of the overlay, which created a more organic, flowing silhouette, to suit the beach setting.  

First I cut back the bodice and took it in to fit Kathryn's shape, marking the new design lines around the hip and necklines, shown below.


Then, onto the dress, I draped the corset shape in calico, extending from the new neckline to the hip line. I then transferred this and made the corset pattern in paper.


Then I made the corset "insides'' from Shapewell and polyester boning, to sit inside the shell of the dress.  There was also a silk lining, from the same (tightened) pattern. 


Then we came to a fork in the (design) roads; once I had a basic re-modelled dress, I started playing with how to adapt these features Kathryn wanted into an original, and appropriate dress.
There were two main directions:

1. As Kathryn had directed, lengthening the lace bodice to the hips. As she is a petite bride, I was concerned about the 1:1 proportion of this design, as it could make her torso look too long. In other words, she would be half torso/half skirt, which is not a great ratio. 
I added the overlay here to soften the sad old polyester skirt, and added a silk petticoat with a duster hem (ruffled). 

2. The second option was this more classical, empire-line design, below. This worked with the original line of the lace, and had a more flowing look to the skirt, which I felt suited her setting better, as well as her figure.


Ultimately, Kathryn and I devised a combination of the two. 
She wanted a fitted form over her tummy, and hips, and felt the softer design wouldn't suit her, so we went with the longer lace to the hips. But I added a belt to raise her waist visually, and we draped the chiffon over her shoulder and across the skirt to get some dynamism into the silhouette, with drape and asymmetry.

Finished gown, with lace to the hip, built in corset,
satin belt and chiffon draped skirt.

Back view

Draped side view

Front; sweetheart neckline, asymmetrical strap and skirt drape.

Again, Kathryn had a great time in her dress, and loved that it was handmade for the occasion. It was a very personal and very cost effective way to create an original wedding dress, and I had a great time doing it. Thank you Kathryn, for thinking outside the box!

Next week, a wedding dress inspired by red carpet glamour.

Friday, April 8, 2011

How to design your wedding dress, part 2.

 The second installment of the the wedding pages...

This gown was designed for a friend's sister. She very bravely decided she wanted me to make her a dress for her March 2011 wedding in Newcastle. I say brave, because, at this point I had only made my wedding dress previously, so it was a big leap of faith for her.

We had a few sessions of talking about ideas, and designs, and the overall style of the wedding, once this had materialised a bit. I think one mistake that brides can make is matching their wedding event to the dress they bought two years ago, or whenever they began organising. Whilst it may be fun and tempting to buy your dress straight up, until you have booked in a few essentials (venue, season), you may end up trying to make your wedding work around a dress which is incongruous.

Like I said last week, the three most important defining factors to choosing an appropriate and original wedding dress are:
1. Setting
2. Season
3. Style (theme) of the wedding.


For Kate, these were:
1. Indoors - Victorian- period ballroom
2. Autumn - Newcastle, NSW
3. Evening, indoor formal modern ceremony and reception.

We spent a day looking at fabrics together, and trying to narrow down the fairly broad ideas Kate had. Like many brides, she went through a lot of searching for source inspiration and had many many pictures that she "liked". I think we shared about 60 photos in the first set of emails, so I was working from a huge base of references.
Neckline reference
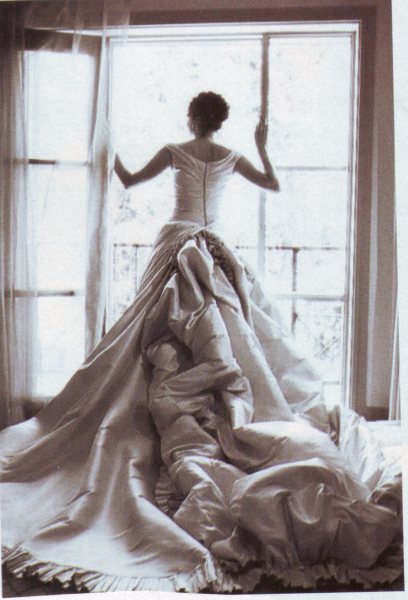
Overall image reference: this was the picture that
typified what Kate loved about "a wedding dress".
Also the great train.
Back detail.

The good thing about that was I was able to get a great overview of the elements that Kate loved in the gowns; there were many linking elements when the dresses were broken down, like repeated necklines, skirt shapes, and the overall "feel" Kate was drawn to: classical, romantic and very feminine.

We looked at laces initially, but that turned out to be too busy, and was difficult to narrow down the right kind of lace, colour and satin underneath. So, in the end, we decided on a plain, heavy silk satin crepe, in a "natural' colour (just off-white).
Kate's focus for the dress became simplicity and elegance, and something her fiancee would love to see her in. She wanted to accessorise with pearls and so the satin was a natural choice. Her overall theme was very restrained, and so a simple, but glamourous dress would suit her wedding context.

Initial design after fabric shopping; Bias skirt with
train and cowl back. Fitted bodice and slim line overall.

We began draping and playing with silhouette ideas, as Kate was keen to see the ideas on her, not on paper.

Paper toile, for a fitted bodice
Changes; draped and gathered style.


Kate lives in Newcastle, so we had to factor in three fittings in Melbourne over the five months before the wedding, and we were able to make effective and personal changes each time. 
For Kate, who, is a doctor, not a seamstress, I think it was a series of great excitements and major anxieties, as I was putting her in draft dresses, in order to refine the design; I knew how it would turn out, but she really had to trust me, and she did! 

Refined design © E. Christian 2010
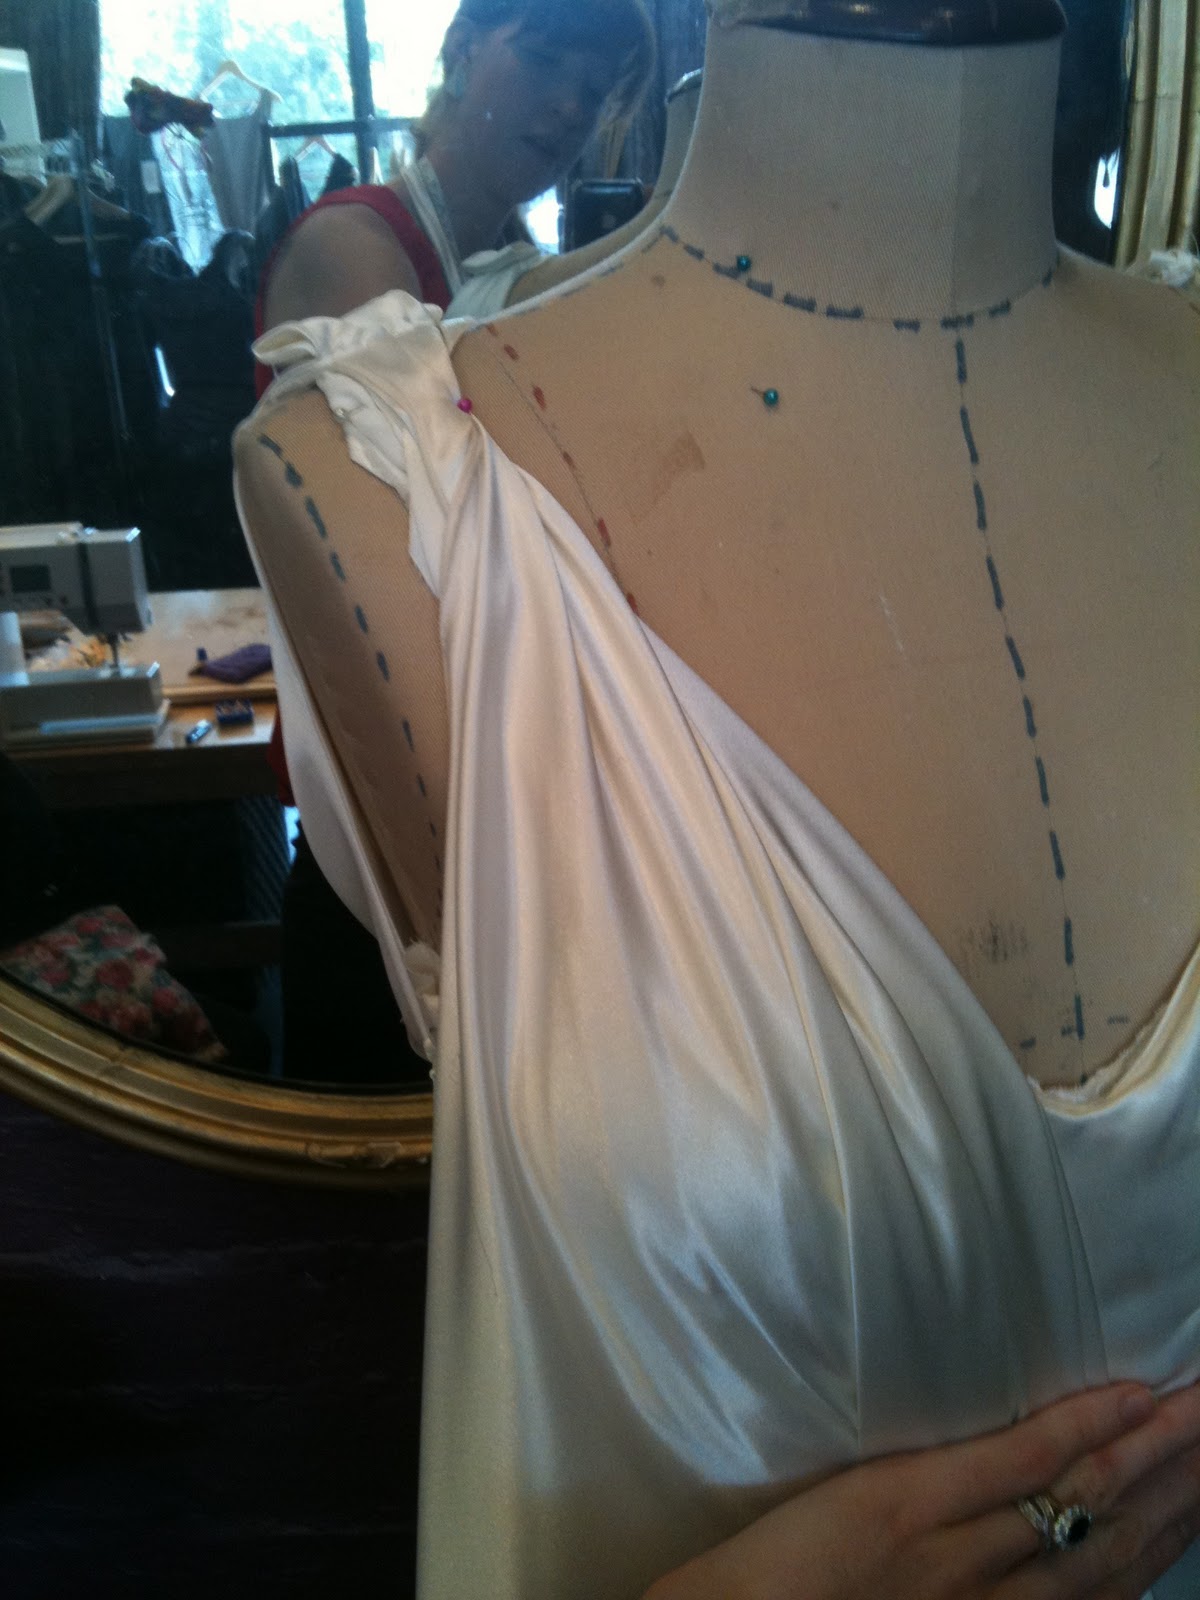
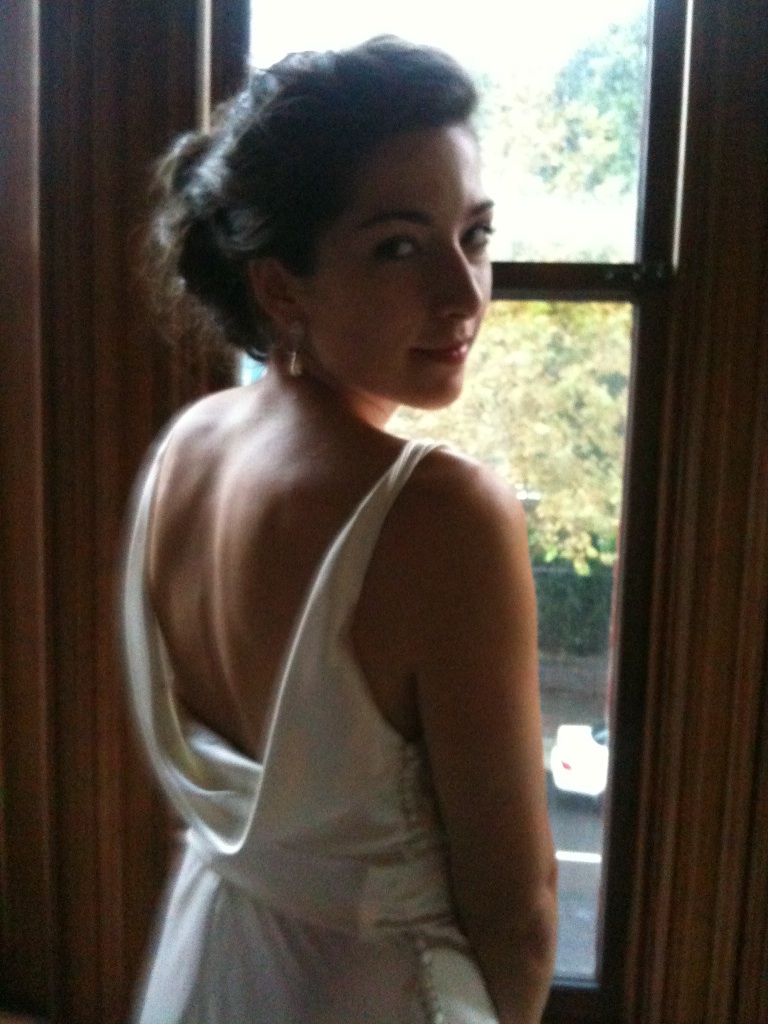
Features gathered bodice, cowl back and 
full bias skirt w train.


Final toile, January 2011.
The major design changes that I wrought from Kate's original ideas were mostly about resolving her required "features" like the draped bodice, with the cowl back, and the height of the waistline. I raised this to make the proportions harmonious and added a belt to bring the draping and texture down from the bodice into the body of the dress. It needed a focus point.
From the above toile I also expanded the circle of the skirt and train, to get the drama Kate wanted in the overall drape of the gown. 

Draping the bodice

Cutting out... tricky on a narrow table..
The real thing.. skirt assembled.
Bodice attached to skirt.
So, when we got to the final fitting, everything was resolved and Kate was delighted with the result.
I added a long row of 30 self-covered buttons, instead of a boring zip, 
to finish it with a real hand-made touch. 
I also added adjustable straps inside the back of the bodice to keep the gown in place, and maintain the tension between the front and back draped bodices.
With train tied up, for dancing.
Finished dress with self belt
 
Kate on her wedding day.


In the end I was really happy with the dress; it was an amazing learning experience, and I have been able to really perfect some techniques with silk satin, which is such a tedious fabric to get to perform exactly.  

From all accounts Kate had a great Day, and looked fantastic, and it was a pleasure to be part of her wedding. Hopefully there will be a couple more photos to follow soon.

Next week, a 1970's wedding gown conversion!